
Many companies in different sectors are acquiring cloud-based applications and tools. However, when adopted with improper visibility and control, it can lead to data leakage or open an attack surface for the threat actors. It can also create an unclear picture of the vast cloud environment.
Cloud asset management is a non-technical aspect of cloud service. It helps to keep track of every aspect of cloud services, security and compliance, and administration. Adopting a cloud-based service or platform and tracking cloud assets is crucial for organizations working with the cloud, which can be confusing as almost everything in the cloud is non-tangible. It is challenging to have a clear vision and control over the cloud.
Cloud asset management provides complete visibility and control over the assets and infrastructure that make up the cloud environment. It enables us to keep track of all the services used in the cloud environment.
In the blog, we will talk about an open-source tool named Steampipe used to monitor cloud infrastructure using SQL.
What is Steampipe?
Steampipe is an open-source asset management tool for querying various cloud APIs using simple SQL queries. Every query you run makes an HTTP request to the cloud’s API and fetches all the data from the cloud platform based on your query.
To install Steampipe, check out Streampipe official downloads page. We need to install the plugins supported by steampipe to query any cloud platform. To install the AWS plugin, run the command on your terminal:
steampipe plugin install aws
Steampipe uses the default credentials present in the .aws directory. These credentials can also be written in the aws.spc file, which precedes the .aws credentials file.
You can run commands as shown below to open an interactive shell.
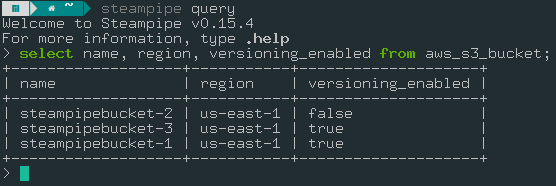
You can also run the select * from aws; but it’s recommended to only query the columns we need. It will save Steampipe from making unnecessary API calls.
Steampipe query has the feature of auto-complete. It also has meta-commands that start with a . (Period).
For Example
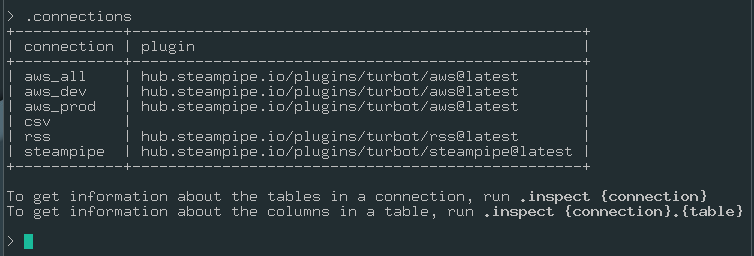
.connections - It lists all the connections present in the steampipe.
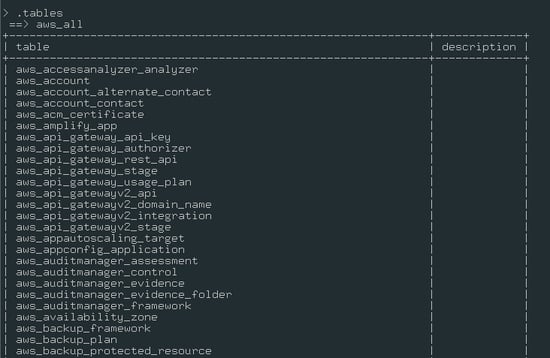
.tables - List or describe all the tables.
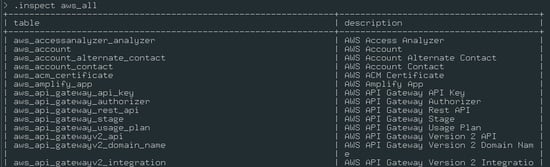
.inspects - View connections, tables, and column information.
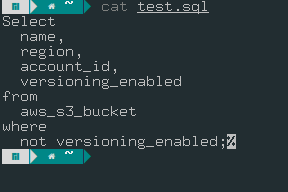
You can also query an SQL or CSV file, which can help you automate the query on the server or run the same long query repetitively.

Steampipe gives the output in the form of a table. This output can be changed into different formats, such as CSV and JSON. To do that, you need to add the --output flag.
For Output in CSV Format:
streampipe query <<file_name>>.sql –output=csv

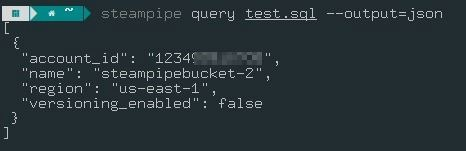
For Output in JSON Format:
streampipe query <<file_name>>.sql –output=json
Understanding Architecture Behind Steampipe.
Steampipe uses an embedded PostgreSQL database under the hood. You can use standard Postgres syntax to query and explore the data. Steampipe helps us visualize the assets in a relational database; to do that; Steampipe leverages the PostgreSQL Foreign Data Wrappers.
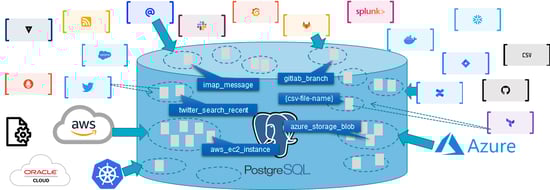
A foreign data wrapper is a PostgreSQL extension that allows you to access a table or schema in one database from another. When a user writes a Steampipe SQL query, Steampipe translates it into API calls executed in real-time across one or more cloud service APIs.
The data returned is organized into tables using a PostgreSQL Foreign Data Wrapper (FDW). However, it does not store any data. Steampipe does not have a persistent database; it only stores data in a cache for a few minutes. But we can save the data in a CSV file or a different database.
Steampipe uses dashboards to visualize the assets in charts and tables written in HCL and packaged in mods. These mods are collections of related Steampipe resources such as dashboards, benchmarks, queries, and controls.
Plugins Supported by Steampipe.
Steampipe supports 90+ plugins which makes it very efficient for all cloud users. New plugins are added often. Steampipe also allows users to create custom plugins based on their requirements.
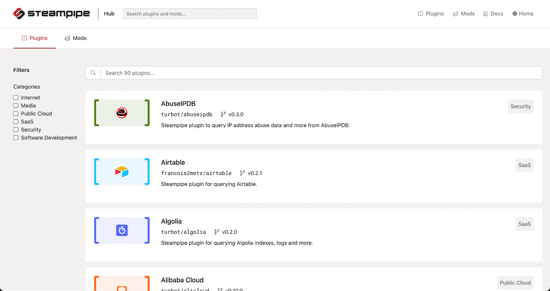
Steampipe supports plugins such as AWS, Azure, GCP, Kubernetes, Docker, DigitalOcean, GitHub, Jira, Slack, and many more.
Steampipe Dashboard
Steampipe helps you check the data collectively on a terminal and gives you the advantage of visualizing it through a dashboard. The dashboard is created using the HCL-HashiCorp Configuration Language, packaged in mods.
A Steampipe mod is a portable, versioned collection of related Steampipe resources such as dashboards, benchmarks, queries, and controls.
AWS has five mods present in Steampipe. These mods are on the Steampipe Hub and can be shared with anyone through any git repository. You can start the dashboard server and view dashboards with the steampipe dashboard command. Steampipe will start the dashboard server on your local machine on the following URL:
We can perform compliance checks as well with the help of a dashboard. Let's see the compliance mod of AWS.
To install the AWS compliance mod, run the command:
- Clone the repository using the command: git clone https://github.com/turbot/steampipe-mod-aws-compliance.git
- Change the directory using the command: cd steampipe-mod-aws-compliance/
- Then run the steampipe dashboard command to start the dashboard
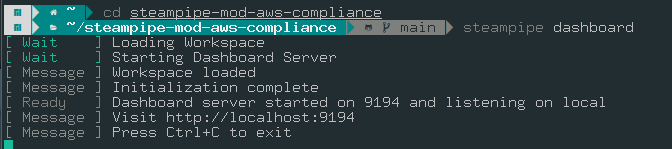
To run the dashboard, we must be in the directory where the mod files are present (In this case, the steampipe-mod-aws-compliance directory)
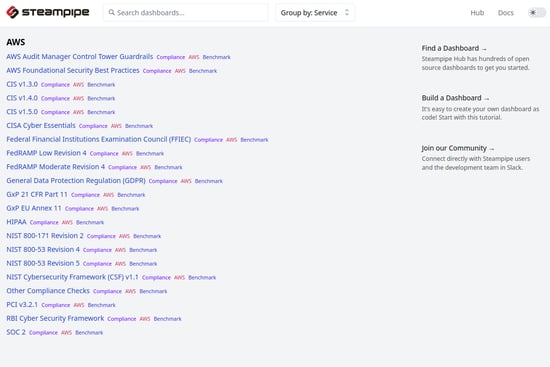
This is what the dashboard looks like. The dashboard shows all the available compliances for AWS. We can use the available templates to run a quick compliance check against our cloud environment.
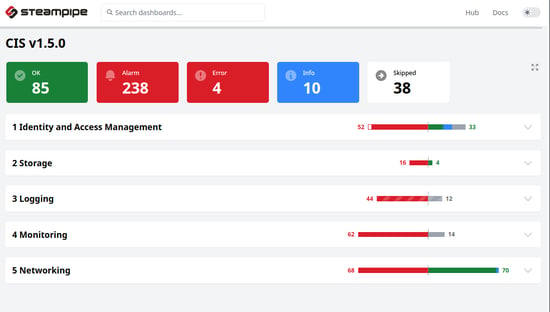
Let’s run a quick CIS benchmark test against our AWS account.
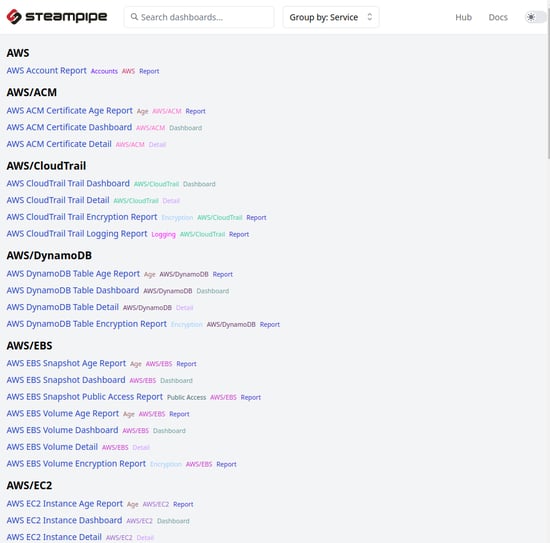
Similarly, Steampipe has an insight dashboard that allows scanning a specific AWS service. However, this doesn’t cover all the AWS services, but you can design your dashboard for querying the AWS resources as per your need. Following are some AWS resources we can query from the insight mod.
Multiple AWS Accounts on Steampipe
Steampipe not only helps us monitor a single AWS account but also helps us query multiple AWS accounts using the same dashboard. We can do that with the help of connections and aggregators.
Connections help you connect with multiple schemas, which in this case are multiple AWS accounts (aws_pros and aws_dev), and aggregators allow you to query multiple connections simultaneously (aws_all). These connections are mentioned in a configuration file. When a plugin is installed, a configuration file is created with the .spc extension.
To create connections, go to the .steampipe directory > config and edit the aws.spc file.
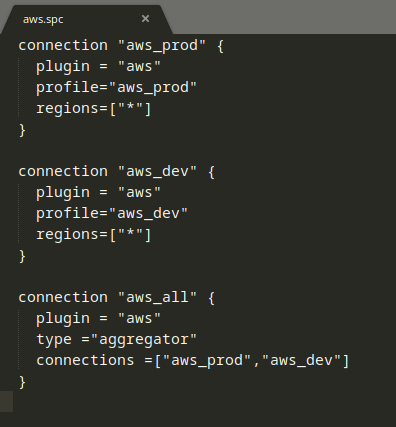
This file uses HCL(HashiCorp Configuration Language) syntax. A connection block defines the connections. The connection must contain a single plugin argument that specifies which plugin to use in this connection. You can also mention the region that you want to query.
Note: Before adding the connections, you must configure each AWS account using the AWS configure --profile command. Use the name of the profiles from the .aws directory, or you can add the access key in the connection block.
You can query the aggregator on steampipe, as shown below:

For example, using the aggregator, we will query the S3 buckets in multiple AWS accounts.
These aggregators are very handy for viewing the data on the dashboard. You can run the mods and view the resources of different accounts.
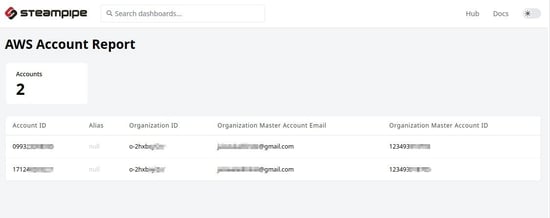
Here, we can see how many accounts are monitored in the dashboard.
To view the same data, we can run the command on CLI:
select * from aws_aws_all.aws_accountl
Note: You can replace * with the information you want to query, such as account_id, etc.

There are various other things as well that we can accomplish using these features:
- Find the users without MFA in multiple AWS accounts.
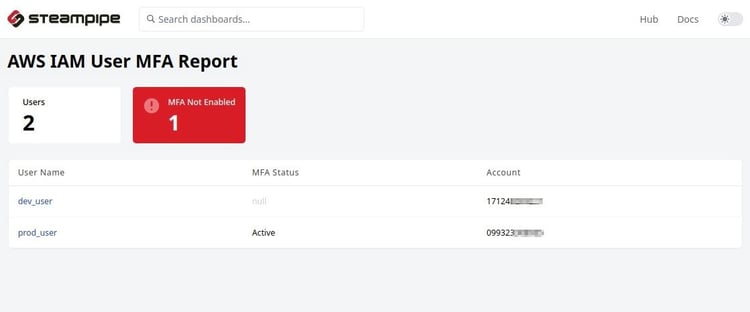
Using CLI:
select name, user_id, account_id, mfa_enabled from aws_all.aws_iam_user;

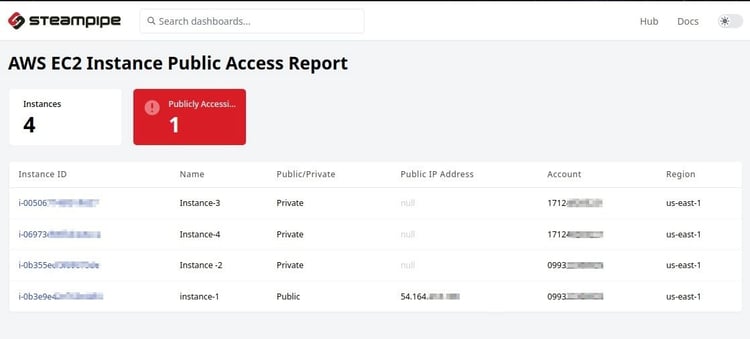
- List the EC2 Instance ID from different accounts that have public IP
Conclusion
Steampipe is an amazing open-source querying tool and an asset inventory dashboard. It solved the context-switching problem, where we had to bounce back and forth between different tools and tabs to understand our cloud environment. It gives us a centralized place to view cloud resources. It is also beneficial for non-coders who have to write long python codes. It requires only basic SQL knowledge to query the data. It solves the problem of visualizing data by providing an interactive dashboard.
Hence, Steampipe helps us understand our cloud environment better and make our environment more efficient.
Resources
- Streampipe
- Streampipe Plugins
- Streampipe Mods - https://hub.steampipe.io/mods
- Streampipe - Writing Dashboards
- Create a multi-account dashboard using connections